You can create and connect a Facebook business page with a Website Builder Business Plus plan

With a Website Builder Business Plus plan, you can create a Facebook business page to match your Website Builder design theme and business information. This does not affect your Facebook personal page — only your Facebook business page. You must have a Facebook account to use this feature.

  1. Log in to your Website Builder Business Plus account.
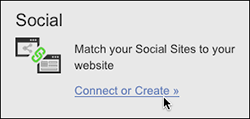
  2. In the Dashboard tab, find the Social section in the right-hand column and click Connect or Create.
    In the Social section, click Connect or Create
  3. At the bottom of the Preview Mode’s Social tab, click Managebeneath the Facebook page preview.
    In the Social tab, click Connect Now
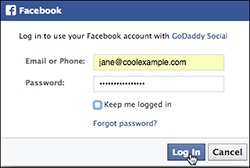
  4. Click Connect to Facebook, enter your information and click Log In.
    Log in to Facebook
  5. Click Okay when asked if you want 1 Social to manage your pages. This enables the 1-Facebook page matching.
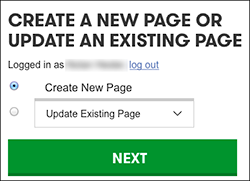
  6. Choose Create New Page and click Next.
    Click Create New Page or use the Update Existing Page menu
  7. By default, the Customize Your Facebook Page imports your Cover/Profile photos from your Website Builder account, along with your business’s name, phone number, and website address. Select a business Category and enter a brief business description in the About field (required by Facebook).
    Customize your Facebook page

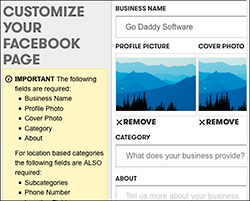
     Note: If you have what Facebook considers a location-basedbusiness, you’ll also need to include a business subcategory, phone number, and physical address (including your country).

  8. To replace your Profile or Cover photo, click its Remove button and then Upload Photo.
  9. Navigate to an image, select it, position the image cropper as needed, and click Crop and Save.
    Click Crop and Save
  10. Once the preview of the new photo appears, click Create Page.
    Click Create Page

     Note: If you decide that you want to create another page instead, click Back and return to Step 6.

  11. After your Facebook business page is created:
    • Click Visit Facebook Page to see the results.
      Check out your new or updated Facebook page
    • Or click Done if you want to return to the Preview Mode’s Socialtab.

Adding apps – Connect with your customers by adding spots for social media

Connect with your customers by adding spots for social media, YouTube, Google Maps, PayPal, and Yelp on your website. You must have a Business or Business Plus plan to add Paypal or Yelp.

  1. Log in to your Cheap Domain Registration .com account.
  2. In your Products list click Website Builder, and then click Managenext to the account you want to use.
  3. Click Edit Site.
  4. From the left-hand side, select the app you want to add. (If you want to add Email Marketing, Paypal, or Yelp, click Apps, then select the one you want.)

     Note: To add a YouTube video, you’ll need to click on the sample video that is displayed, then click Settings to input the URL of the video you want.

  5. Click Save after you’ve selected an app and followed the instructions to add it.
  6. Click Publish to update your site online.

Adding an audio player with Website Builder Business and Business Plus plans

With Website Builder Business and Business Plus plans, you can add an audio player to your website and even upload your own music. The audio widget only supports MP3 files. Each file cannot exceed 30 MB.

  1. Log in to your Cheap Domain Registration .com account.
  2. In your Products list click Website Builder, and then click Managenext to the account you want to use.
  3. Drag and drop the Audio Player onto the page, click inside the audio box, and then click Settings.
  4. To add music:
    • Click Manage Playlist.
    • Click Add Audio.
    • Browse to find the file on your local drive or drop it on to the screen.
    • Click Save.
  5. Under Options, select if you want your audio player to show your playlist, loop your playlist, shuffle your songs, or start automatically.
  6. To add album art or an image:
    • Click Add Image.
    • Select if you want to use a photo from your computer, a free image, Facebook®, or Instagram®.
    • Browse or connect to find the image.
    • Click Insert.
  7. Optional: Go to the Advanced tab to add or edit other effects for your audio player, including Background Color, Border, Shadow, Rounded Corners, Transparency, Margin, and to edit the Size of the box.
  8. Optional: Go to the Add Audio, Manage Playlists, Gearwheel to change author and title of song.
  9. Click Save.
  10. Click Publish to update your site online.

Enhance the look of your website by adding image slideshows and photo galleries to your website

Website Builder lets you enhance the look of your website by adding image slideshows and photo galleries to your website.

With image slideshows, you can showcase your images on your website through slide presentations. With photo galleries, you can display photos on your website that give your visitors the option to click them and view larger versions.

  1. Log in to your Cheap Domain Registration .com account.
  2. In your Products list click Website Builder, and then click Managenext to the account you want to use.
  3. Click Edit Site.
  4. Drag and drop Slideshow Icon for an image slideshow or Photo Gallery Iconfor a photo gallery onto the page, and then click Swap Images.
  5. From the Manage Photos window, click Add Photos, and then select one of the following options:
    • My Photos — Click Browse, to select an image you want to upload from your personal computer, and then click Open.
    • Free Images — To select images from our image library, enter a search term to find specific images in our image library, or select a category from the All categories menu.
    • Facebook — To import images directly from your Facebook® account, click Connect to Facebook, log in to your Facebook account, and then click Log In with Facebook.

       Note: To disconnect from Facebook, go to your Facebook account settings, click Apps, and then click X next to Website Builder.

    • Instagram — To import images directly from your Instagram® account, click Connect to Instagram, log in to your Instagram account, and then click Log In with Instagram.
  6. Select the images you want to use, and then click Insert.
  7. To change the order of your photos, simply drag and drop them into place.
  8. Click Save.
  9. Click Publish to update your site online.