Adding attachments to campaigns – Email Marketing

Email Marketing does not support traditional email attachments, but you can still share files with your recipients.

Why can’t I attach files to my campaigns?

This is because attachments can significantly hurt the ability of your emails to land in your recipients’ inboxes. Bulk emails with traditionally attached files, most likely will end up in the spam folder. There are many cases of attachments being used to spread malware, so campaigns that contain attachments are likely to be flagged as spam by ISPs (internet service providers) and email clients.

How to send files to your subscribers without attaching

Store your file somewhere online (such as your own website), and generate a public link to that file.

Store your file with… How to generate a link
Online Storage (Workspace Email) Copy a public link
Google Docs Share a link to a file
Dropbox Share link

Next step

Next, take that generated link, and put it into your campaign. You can link your file to:

Viewing and editing subscriber details – Email Marketing

Only Name and Email details are displayed on the main page of your Subscribers area, but you can always view and edit subscriber details in a couple of clicks.

  1. If you haven’t already, log in to your Email Marketing account. (Need help logging in?)
  2. In your Subscribers area, click on the email address to view or edit their details.
  3. Click in any field you see, to edit it.
  4. Click Add to List to add the subscriber to any of your specific lists. The subscriber’s current list memberships are unaffected by this action.
  5. Click Add another field to add another data field to that subscriber, only.

Next step

Making a regular campaign into an autoresponder email – Email Marketing

So you’ve created a new campaign, in your Campaigns page… and now you want to use it as a Autoresponder email. Fantastic, you’ve come to the right place.

When you click the Clone button on any campaign in your Campaignspage, an exact copy of that campaign will be created. You can also use this very same button to clone that regular campaign into an Autoresponder email!
Click the Clone button

Pro tip: Make sure you create your Autoresponder first! That way, you’ll be able to tell Email Marketing exactly where to put the cloned campaign.

When you’re ready, just click the Clone button, and select the Autoresponder option from the overlay page that pops up.

Choose the correct campaign from the list of all your Autoresponders, and then click the Clone button. Email Marketing will take care of the rest for you. Go to Autoresponders under the Add-ons menu, to check out your new addition.

All about Autoresponders – Email Marketing

What is an Autoresponder?

These campaigns are an awesome way to send a series of interval-based emails to people automatically, when they’re added to a specific list in your subscribers. They are great for sending out welcome emails, follow-ups or a series of emails all about a specific topic.

An Autoresponder, consists of emails that you create, place in a certain order, and then specify the intervals at which they’re sent. You can activate the Autoresponder feature via the Addons menu, at the top of any screen. Just choose Add more and then find the Autoresponder option.

Why would I want to use Autoresponders?

An Autoresponder is different from a regular email because it’s an automated series of emails. You set it up once, and then anyone added to that specific list automatically starts to receive your campaign.

A regularly scheduled email is just a single email you send out to your list on a specific date. The Autoresponder, however, will send out a series of emails, in an order and frequency that you specify, all starting at the time the subscriber signs up. You design how it works, and never have to do another thing with it!

Because it’s automated and pre-set, an Autoresponder is perfect for:

  • automated welcome emails, when someone signs up for your content
  • delivering a sign-up gift download
  • a curriculum, or instructional series of emails
  • a quote or thought-a-day series
  • nudges, reminders, or check-ins for your subscribers
  1. If you haven’t already, log in to your Email Marketing account. (Need help logging in?)
  2. Activate the feature under Addons at the top of any screen. Choose Add more, and then scroll to the Autoresponder option. Turn it on, and then click on Go set it up. After you’ve activated the addon, you can find it as the Autoresponders option under the Addons menu.
  3. Click New Autoresponder and specify your settings in the Create a new autoresponder screen. These include:
    • The name of the whole Autoresponder
    • The list associated with the Autoresponder (CANNOT be edited).
    • The standard interval between emails (CAN be edited)
    • Whether or not the first email should send immediately
    • Whether or not to send the Autoresponder on a weekend
  4. Click Create my Autoresponder! to save those settings. Then click Add the first campaign, and select Compose new, to create the individual emails. This is exactly the same as composing a regular campaign.
  5. Specify the mailing details for each of the emails that you create. This includes all the normal email sending details, the interval to use to send the email, and whether or not to send the first email immediately after someone subscribes.
  6. After you’ve completed the first email, click Add another campaign, and repeat until you have all of your Autoresponder emails created. You can go back, and change the intervals between them at any time.
  7. Check that everything looks good, and click Start or Run. Anyone already in your associated list will be treated like they just signed up, and they’ll start to receive the campaign. Anyone who is added at any point later will start the campaign at that time.

So How Do the Intervals Work?

Autoresponder intervals are just the amount of time Email Marketing waits before sending the next email in the campaign. You can set the standard interval between emails right when you set up your Autoresponder. And you can also adjust them individually at a later date.

For the first campaign in your Autoresponder, you can decide if you want it to send immediately after the person subscribes to your list or not. For all other emails, the interval is expressed in amount of time AFTER the person receives the PREVIOUS email.

To Change the Intervals

  1. Under Addons, go to Autoresponders.
  2. Click Edit on the individual Autoresponder.
  3. Click on Settings underneath the campaign you want to change.
  4. Change the interval using the buttons at the top. Only for the first email in the Autoresponder, you will have the option to send it immediately, or not.

To Start and Stop an Autoresponder

When you first set up your Autoresponder, it will be paused. You’ll have to manually start it once you’re ready to show it to the world. You can start it from two different locations:

Go to your Autoresponder area.

  • Click Run under any of your Autoresponder thumbnails, OR:
  • If you’re already in a specific Autoresponder, then just click on the Start in the top right.

If your campaign is already running, you can pause it at any time, too. You do this exactly the same two ways as starting it!

Go to your Autoresponders area.

  • Click Pause under any of your campaign thumbnails, OR:
  • If you’re already in an Autoresponder, just click on Pause in the top right.

To Make a Regular Campaign an Autoresponder Email

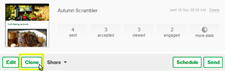
You can actually clone any regular campaign you create right into an Autoresponder. You’ll need to have the Autoresponder created already so that the campaign can be easily cloned into it.

  1. Click the sheep clone button underneath the campaign thumbnail of the email you want to make into an Autoresponder email.
  2. Select the Autoresponder option, and then select the specific one you want to clone it into.
  3. Click Clone and that’s it!

How do I Connect My Signup Form and an Autoresponder?

This is probably the most common use of the Autoresponder feature, or really any auto-responder functionality, in general. When something exciting happens (someone subscribes to your list), you want to react (send them a welcome email)! Who doesn’t? In order to make sure that your Welcome Email campaign sends automatically to your new subscribers, you just have to connect your signup form to the same list that is associated with your Autoresponder. (For details about signup forms, see Signup forms .)

To Connect Your Signup Form to an Autoresponder

You can only associate a single list with each of your campaigns, but you can have several lists (or none!) connected to each of your signup forms:

  1. Click on Signup Forms at the top of your screen.
  2. Click Edit under your specific signup form, in order to adjust which lists are connected.
  3. Check that your Autoresponder list is connected to your signup form, and that your campaign is running, and you’re all set!

For more detailed instructions, check out the Step-by-step Tutorial for Connecting Signup Forms and Autoresponders.

Create your own custom style – Email Marketing

You have several pre-set style options to choose from, in your Styles menu. You can also edit any of the existing color or text settings in each one of those. You also have the option of creating your very own, custom style.

  1. If you haven’t already, log in to your Email Marketing account. (Need help logging in?)
  2. In your Email Marketing account, click Campaigns.
  3. Click Compose for a new campaign, or Edit on any existing campaign.
  4. Click the Styles tab, on the right.
  5. Click the Create your own.
  6. Enter a unique name for your custom style.
  7. Click the button for how you want to start your own custom style:
    • Create new will start you from scratch. This is best for totally fresh looks.
    • Clone current will copy the currently selected style. This is the best option for small changes.
  8. Next to Name, you can change the name of the style.
  9. Next to any of the elements listed, you can enter a hex code, or click the colored box to choose from a color picker.

     Note: As you select different options your campaign will change, so you can preview the new looks, in context.

    Element Details
    Background This is the color surrounding your campaign, on the outer margins.
    Foreground This is the color inside your campaign, behind the text and image content.
    Button In addition to choosing the color of your buttons, you can also choose the button style:

    • Flat button style Flat
    • Pill style button Pill
    • Chunky style button Chunky
    Border This can be turned on and off with the check box. This is a colored line around your campaign content, between the Foreground and the Background colors.
    Footer This can be turned on and off with the check box. If it is turned off, the footer details will display on the Background color.
  10. Click the Text tab.
  11. Click on any text type to customize the style.
  12. Click on any option to set your style.
    Option Details
    Font Select your desired font from the menu.
    Color Enter a hex code, or click the colored box to select from a color picker.
    Size Click the larger A to increase the font size, and the smaller A to decrease it. The actual size in pixels displays to the right.
    Alignment Choose which alignment you want this text type to use. Your options are left, center, right, and justified.

     Note: For Link text, you only choose color. All other settings are inherited from regular body Text.

     Note: For Button text, you can’t change alignment, here. Alignment is changed in the button module, in the composer.

     Note: For Footer Text, you can’t change alignment, here. Footer alignment is controlled through the Campaign Tweaks Add-on.

  13. When you’re finished with a specific text type, click <, to go back to the main list of text types.
  14. When your style is finished, click Update.

Your new custom style will always appear in your style list, so you can use it for any campaign.

Making your emails social – Email Marketing

What’s better than an Email Marketing campaign? An Email Marketing campaign connected to all your social profiles, and sharable by your subscribers!

In Email Marketing, there are two different types of “Social Links” that you can add to your campaigns. The first are Social Icons, that link your users to your various profiles on all your different social platforms. The other are Social Sharing Links that let your readers share the email, themselves.

Adding Social Icons to your Email Marketing campaigns

You can connect any of your social profiles to your Email Marketing account, and have each of them show up as an icon at the bottom of your Email Marketing emails. (You can also change the position of them, using our Campaign Tweaks add-on, or insert them manually with our macro shortcuts, too.) Just click on Addons at the top of any Email Marketing screen, and then on the Social option. Then you can set it up, from there.

Social link button icons in campaign

You won’t be able to see this row of icons, while you’re editing your campaign. But they will show up on the Preview page, and when you send your email, for sure!

Now, these icons are not used for sharing your campaigns, but have no fear! Read on, to include ways for your readers to share…

Adding Social Sharing Links to your Email Marketing emails

The Social Sharing Links are a way for you to encourage your subscribers to get involved in the conversation, and share your emails themselves.

When you hit Send on any campaign, and get to the Mailing Details page, you’ll see a column of checkboxes at the bottom. You can tick these options, to add your sharing buttons to the very top of your email. You can choose to add buttons that will let people do the following:

  • like on Facebook
  • tweet on Twitter
  • pin to Pinterest
  • +1 on Google+
  • like on LinkedIn

Social share options display above email

Saving a campaign – Email Marketing

When working on a campaign, always make sure to save your changes! Save early, save often!

Just click Save in the upper right corner, to the left of your Campaign Title.

Save Button

The Save button will change to display the word Saving… in gray, after you click. This is how you know that Email Marketing is working on committing all your wonderful changes! The button will reappear once the email campaign has been successfully saved.

It’s important to also notice the timestamp, in the far upper right of the composer page. It’s right next to the Preview button, and will show the exact time and date that this campaign was last saved.

This does not happen often, but if that timestamp doesn’t update when you click the Save button, then just try again. If it’s still not updating, there’s a problem with your connection to the server. Try to save as much of changes in outside text-editing program as you can. You can try again in a few minutes, but once that connection has been interrupted, you may have to restart your page to re-establish it, losing your changes.