Add contacts to the All subscribers list – Email Marketing

Follow these steps to add contacts to the subscribers area of your Email Marketing account.

    1. If you haven’t already, log in to your Email Marketing account. (Need help logging in?)
    2. Select the Subscribers tab at the top of your account.
    3. Click on Add Subscribers to reveal the import options.
    4. Select the Many at a time tab to choose a file to upload. Or select the One by one tab to enter your contacts individually.

Note: If you would like to add just a single contact, you can use either tab. In the One by one tab you can add the email and name details into special fields for that data. And in the Many at a time tab, you can simply paste the details into the Paste subscribers field.

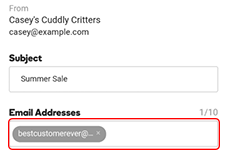
    1. Enter your contact details:
    2. Choose the list to import your contacts into:
    3. Click Add Subscriber(s).

Note: If you are on the One by one tab, the window doesn’t close automatically. This is so you can easily add another subscriber. To close the window, just click the X.

Overview of the Campaigns page – Email Marketing

After you’ve opened to your Email Marketing account, you can see see the Campaigns page by clicking Campaigns in the top menu. This is where you’ll create your email campaigns and newsletters. Let’s take a tour:

Email Marketing now uses responsive email templates. With the responsive email templates, your emails will automatically scale to fit any screen. Whether it’s viewed on a laptop or a smartphone, your campaigns will look great. There’s no additional action needed to take advantage of the feature.

View your campaigns

Recent email campaigns or newsletters you’ve created appear in the center of the Campaigns page. All others appear under the Compose! button in the sidebar.
All campaigns in the center and under Compose

When you select a campaign, it opens in the center of the Campaignspage.
Open campaign in center of the page

Campaign statistics

Statistics appear in the summary section for each campaign. These numbers show the total overall stats for the campaign. Click more stats to see a detailed overview of the campaign. Learn more about email marketing statistics.

Campaign tools

These tools are available for each campaign on the Campaigns page.

Campaign tools

Below are the descriptions of the buttons on the toolbar for each campaign:

Button Description
Edit Click to open and edit the campaign.
Clone Click to “clone” a campaign, making an exact copy of the campaign in the Campaigns page. Email Marketing adds an incremented number to the campaign title so you know which copy is the clone.
Share Click Share to see a list of social media platforms where you can share the campaign. If you’ve set up the social sharing buttons in the email, you can click any of these to directly share the newsletter on a social network.
Schedule Click to schedule the campaign.
Send Click to send the campaign to subscribers.
more stats Click to show the overall or combined stats for all mailings of a campaign.

Create your first email campaign – Email Marketing

Get started by creating your very first email marketing campaign.

Note: This article covers creating a campaign with text and images using the tools availble in Email Marketing. It’s possible for you to create a plain text email campaign, or you can use custom HTML to create a campaign from scratch.

  1. Log in to your Email Marketing account. (Need help logging in?)
  2. Click the Compose! button in the right panel.
    Click Compose

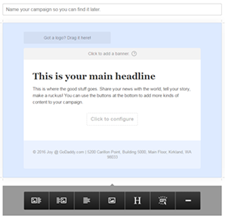
    A blank campaign opens that looks something like this:

    Blank campaign

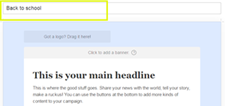
  3. Enter a name for your campaign.
    Enter a name for your campaign
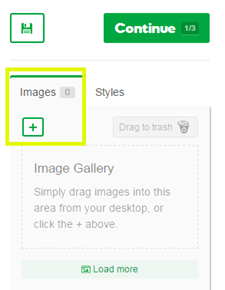
  4. To upload a banner image, click the plus sign on the Images tab.

    A banner image is the graphic (590 pixels wide) that appears at the top of your email campaign, giving your readers a first impression. For more information see, Add a banner image

    Click the plus sign

  5. Browse to the image you want to upload to the Images tab, and click Open.
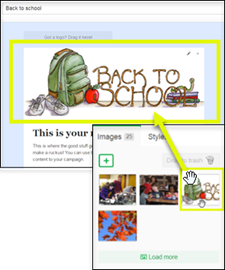
  6. Click and drag the image from the Images tab to the banner placeholder.
    Click and drag the handle
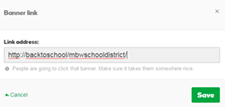
  7. In the Banner link dialog box that automatically appears, enter the URL you want people to go to when they click the banner image, and then click Save.
    Enter the link address and click Save
  8. Click This is your main headline, enter a headline, and click OK.
    Enter a headline and click OK
  9. To structure your email campaign layout, use the module buttons located at the bottom of the campaign.
    Module button Name Description
    Image and text composer module button Image & Text A mixed module with an image holder on the left, and a text block on the right.
    Text and image composer module button Text & Image A mixed module with a text block on the left, and an image holder on the right.
    Text composer module button Text A full width text block. You can format text, and change the text style.
    Image composer module button Image A full width image holder. You can add more images in a row, and you can resize it.
    Section title composer module button Section Title A special text block that contains only top-line H1 styled text. You can change the style of the section title text independent of the other text types in the style editor.
    Button composer module button Button A call-to-action button that allows you to define the display text and link to any URL. You can change the button styling in the style editor. Learn more about the button module.
    Divider composer module button Divider A horizontal line to visually separate different chunks of your campaign.
  10. In the text placeholder, enter your text.
  11. Upload an image to the Image tab, click and drag the image onto the image placeholder (just as you did with the banner image), and click OK.
    Add text and drag image into placeholder
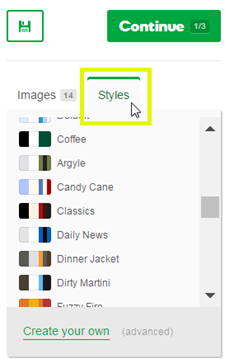
  12. To change the color and formatting of your campaign, click the Stylestab that is located in the right pane next to the Images tab, and choose a style.
    Click the Styles tab
  13. To preview your campaign, click the Preview button.
    Click the Preview button

    At this point, your campaign may look something like this:
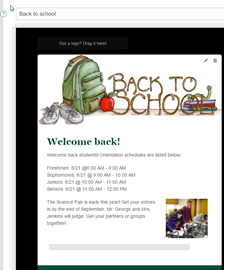
    Email marketing campaign
    You can add more modules that contain section title, image, text, and button placeholders. Simply repeat steps 9, 10, and 11.

  14. In the upper right pane of your campaign (next to Continue), click the Save button.
    Click Save

Next step

More info

Submitting Your Sitemap to Multiple Search Engines – Search Engine Visibility V1

Your sitemap defines your website’s structure and content, which is something search engines use to crawl and index your site so it can be properly ranked in search results.

Search Engine Visibility V1 lets you submit your sitemap to sites such as Google®, Bing®, and Yahoo!® with one click. Here’s how:

To Submit Your Sitemap to Multiple Search Engines:

  1. Log in to your IFindHost – CheapDomainRegistration.com account.
  2. Click Search Engine Visibility V1.
  3. Click Launch next to the account you want to access.
  4. From the Dashboard tab, click Submit.
  5. On the Submit Your Sitemap page, click Submit To All or submit to individual search engines.

If Your Sitemap is Not Detected:

  1. If Search Engine Visibility V1 does not detect a sitemap, click Tells us where to look.
  2. The Find Sitemap window opens. Enter the sitemap location from your website.
  3. Click Validate. (It takes a few seconds to validate.)
  4. Click OK.
  5. On the Submit Your Sitemap page, click Submit To All or submit to individual search engines.

Note: If you are a Website Builder® or Quick Shopping Cart® customer, Search Engine Visibility V1 auto-detects your sitemap.

For more information, see Search Engine Visibility FAQ

Adding tags to your website – Search Engine Visibility V1

To establish site ranking, and determine how your site appears in search results, search engines look for meta tags, a robots.txt file, and a sitemap file. For more information, see

Optimizing Your Search Engine Tags – Search Engine Visibility V1

Search Engine Visibility lets you view your site’s current tags and create populated tags for easy downloading and pasting in your Web page’s code.

To View Current Tags

  1. Log in to your IFindHost – CheapDomainRegistration.com account.
  2. Click Search Engine Visibility V1.
  3. Next to the account you want to use, click Manage.
  4. From the Optimize tab, select Optimize Tags.
  5. Click the Current Tags tab to view your site’s active tags.
  6. Use the Back and Next buttons to navigate between your site’s pages.

Note: You cannot modify content on the Current Tags tab. To modify or add new tags, use the Optimized Tags tab.

To Create New Tags

    1. On the Optimize Tags page, select the Optimize Tags tab.
    2. Use the Back and Next buttons to navigate between your site’s pages.
    3. In the Title field, enter the title tag.
    4. In the Description field, enter description tags.
    5. In the Keywords field, enter the keywords tags.

Note: For suggestions and guidelines on each tag, click the question mark next to the tag name.

  1. (Optional) Click Select defined keywords to add keywords that you have already defined.
  2. Click Publish All Pages or More Options, and then choose between Download Text File or Export to Webmaster. Continue downloading or publishing for each page as needed.

For details on placing the tags in your Web page’s code, see Where do I paste these tags?

Analyzing site content – Search Engine Visibility V1

Using Search Engine Visibility, you can further analyze the content on your Web pages to ensure you use the keywords most likely to improve your ranking.

To Analyze Site Content with Search Engine Visibility

  1. Log in to your IFindHost – CheapDomainRegistration.com account.
  2. Click Search Engine Visibility.
  3. Click Manage for the account you want to use. The Search Engine Visibility Manager opens.
  4. From the Optimize tab, click Analyze Content, and then click Get Started.
  5. Using the Back and Next buttons, select the page you want to analyze.
  6. Click Rescan.
  7. The content results display:
    • Your Keywords — A listing of your Search Engine Visibility saved keywords.
    • Occurrence — The frequency that a specific keyword is included in the contents of the Web page.
    • Density — The percentage of times keywords are used within the total indexable words on a Web page. Optimal keyword density is 2.5 to 4 percent.

Continue analyzing content until you have reviewed all your site’s pages and identified the best keywords. Use the How search engines see youarea to view actual word and phrase saturation on your Web page. This information lets you determine if you need to update your saved keywords or revise the content on your site.

Once you update the meta tags and content on your website, you can click Rescan to view updated results.

Integrating with Website Builder V6 – Search Engine Visibility V1

To establish site ranking, and determine how your site appears in search results, search engines look for meta tags, a robots.txt file and a sitemap file. Search Engine Visibility V1 helps you optimize this information to increase traffic and make your site easier to find.

Typically, you manually add this information to your site by editing and uploading files. If you use Website Builder V6, however, you can automatically send the information you created when setting up your Search Engine Visibility V1 account.

Note: To send Search Engine Visibility V1 information to Website Builder V6, both products must be in the same customer account. We recommend you backup Website Builder V6 before you send information from Search Engine Visibility V1. For more information, see Backing Up or Restoring Your Website.

To Send Search Engine Visibility Information to Website Builder V6

  1. Log in to your IFindHost – CheapDomainRegistration.com account.
  2. Click Search Engine Visibility V1.
  3. Click Manage for the account you want to access.
    Warning: CAUTION: You might have multiple Search Engine Visibility accounts for a single Website Builder V6 domain. If you do, use the same Search Engine Visibility account when sending information to Website Builder V6. Otherwise, you might unknowingly overwrite meta tags, robot.txt, or your sitemap with incorrect information.
  4. From the Optimize menu, select any of the following:
    • Optimize Tags — Complete the fields for the settings you want to export to Website Builder, and then click Publish All Pages.
    • Control Crawling — Complete the fields for the settings you want to export to Website Builder, and then go to Get File and select Export to Website Builder.
    • Create Site Map — Complete the fields for the settings you want to export to Website Builder, and then go to Get Site Map and select Send Site Map to Website Builder.
  5. Log in to your Website Builder V6 account and follow the prompts to import the SEO information.
  6. Publish your site.

After importing the information, you can modify it. Launch the Page Designer, select the Page tab, and then go to the Properties icon.

Related Material

What Are Search Engine Optimization Tags?
What is a Sitemap?

Setting up and logging in – Search Engine Visibility V1

Search Engine Visibility is an all-inclusive search engine optimization tool. It takes the guesswork out of increasing your site’s visibility by providing keyword suggestions, content analysis, tag optimization, site map tools, submission to search engines, and reports for tracking progress. This article explains how Search Engine Visibility works.

Setting up Your Search Engine Visibility Account

Before you get started, set up your Search Engine Visibility account for the website you want to optimize.

To Set up Your Search Engine Visibility Account

  1. Log in to your IFindHost – CheapDomainRegistration.com account.
  2. Click Search Engine Visibility.
  3. Next to the Search Engine Visibility account you want to use, click Manage.
  4. In Domain, enter the website address to be associated with this account.

    Note: The address must be in this format: www.coolexample.com.

  5. If applicable, select This website contains adult content.
  6. In Country select your country.
  7. Optional: Select your Account Type.
  8. Select that you have read and agree to the Search Engine Visibility V1 License Agreement.
  9. Click OK.

Accessing Your Search Engine Visibility Account

Optimizing your site takes time, and you need to return to your account often to check reports or refine keywords.

To Access Your Search Engine Visibility Account

  1. Log in to your IFindHost – CheapDomainRegistration.com account.
  2. Click Search Engine Visibility V1.
  3. Click Manage for the account you want to use.
    The Search Engine Visibility Manager opens.

Using Search Engine Visibility Tools

Search Engine Visibility provides seven tools for managing your website’s search engine optimization. The tools are:

  • Generate Keywords — Search engine crawlers use keywords to determine a site’s relevance to searches by Internet users. This tool suggests keywords based on keywords and phrases you enter in the search. You can then select words and phrases from the list or define additional keywords.
  • Analyze Content — This option provides an additional analysis of your website’s content. Search Engine Visibility looks at your site content to further determine the best keywords and their compatibility with your website’s content. For more information, see Analyzing site content .
  • Optimize Tags — This tool lets you see any current tags applied to your website and lets you create new tags for optimizing your search engine rankings. For each type of tag, Title, Description, and Keywords, you can enter words or phrases that describe your site and its content.
  • Control Crawling — You can have a little more control over the areas of your site that search engines might crawl. This tool lets you set preferences for your site’s pages and the way search engines crawl them.
  • Create Site Map — Use this tool to customize and create a site map to aid search engines in crawling your site. Your site map provides a URL directory for your site.
  • Submit — The submit tool is your one-stop shop for submitting your site’s URLs directly to popular search engines and directories.
  • Reports — Search Engine Visibility provides extensive reporting tools for checking your search engine optimization. Each report performs a health check of your website and makes recommendations for repairs. The reports include SEO Checklist , Submissions, Page Rank, Keyword Ranking, and Competitors.