Different bounce types – Email Marketing

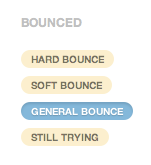
A Bounce means an email was not successfully delivered to the contact. The specific reasons behind the undeliverable address depend on the bounce type: Hard, Soft, General, or Still Trying. We’ll explain each type here:

Click the more stats button

Hard Bounce:

These are email addresses that are totally unknown, obsolete, or incorrect. These will never be delivered to the recipient. These contacts are immediately suppressed, when they encounter a hard bounce. Most often these are old and expired addresses (If you spot obvious typos like example@example.con (instead of .com), you can unsuppress the contact and update the email.)

Soft Bounce:

These are email accounts that often have full mailboxes, their domain is temporarily down, or they’re currently not able to receive email. Email Marketing will send up to 4 future mailings to these mailboxes, and if those bounce, the contacts are suppressed from your active subscribers.

General Bounce:

The most common form of General Bounce happens when a firewall exists on the server of the recipient and prevents them from receiving email from outside their network. This is common in the case of corporations that do not receive email from unknown sources. Email Marketing retries all General Bounces until it’s certain they won’t get through, at which time the contact is suppressed from your active subscribers.

Still Trying:

These indicate that a particular message could not yet be delivered, but that the server is still trying. This bounce type is usually resolved when retrying.

Troubleshooting Contact Imports – Email Marketing

First of all, if you’re having trouble importing contacts into your subscribers area, don’t panic! We promise, everything will be ok. There are a few common reasons that your upload isn’t going as planned, and we’ll walk through them, here.

  1. Your file really needs to be in one of the following file formats for best outcomes:
    • .csv
    • .txt
    • .xls or .xlsx
    • .vcf (vCard)

    If your file is anything else, please re-save the file as one of those, and try it again. Saving your spreadsheet as a CSV is the best way to troubleshoot file format issues.

  2. Make sure you have headers in your file. The first row of your spreadsheet, or the first line of your text MUST be a header row. For example, your very first row or line should look something like this:Example layout for spreadsheet to import contacts.

    or this:

    Email, Name, Company
    gem@godaddy.com, Paul Feldspath, Email Marketing

    or like this:

    Email,First Name,Last Name,Company
    gem@godaddy.com,Paul,Feldspath,IFindHost – CheapDomainRegistration.com
  3. When using CSV or TXT files, the spacing of the headers must match the spacing of the data. If you used a single tab space between your data, there should be a single tab space between your headers. Likewise, if you have no space between your header items, then there should be no space between your data items.
  4. Make sure your headers are appropriately named. You have a lot of flexibility in the actual title you put in the header row, since Email Marketing is good at interpreting your intentions. But if you’re having trouble with an import, change your column headers to match any of the following exactly, and try it again:
    • email
    • name
    • firstname
    • lastname
  5. Your headers should all be a single word, if you’re having any trouble importing your contacts. Use an underscore between words, if you have to, but avoid spaces in your headers.
  6. Don’t use odd characters in your headers. No slashes, or dashes, or hashes, etc.
  7. Look for odd characters in the emails, or any email addresses that are not formatted correctly, like this: —@—.—
    Any email not formatted with an @ and a period will not import into your subscribers.
  8. Scan your file for any hard returns, or blank rows. Those can create problems and partial imports, if present.
  9. Lastly, make sure your file is fully uploaded! You can check the progress of your imports, using the Import history button in your subscribers area. Scroll down the page to the bottom of your lists, on the left. You’ll see the Import History button there, underneath all your subscriber lists. When the file has finished uploading successfully, it will show a green dot and Succeeded. If the dot is grey, and it says Processing, just give it a little bit of time to finish.

Advanced Search Techniques – Email Marketing

Smart Email Marketing – So, you wanna get fancy? The advanced search techniques let you search and sort your subscribers by any number of parameters. You can search for anything in the subscriber detail fields, or by list membership.

To search fields

Type the full name of the field, followed by a colon, followed by the text you want to search for.

[field name]:[search term]

 Note: Keep in mind that there are no spaces in between any of these terms.

Example Result
firstname:Dean All subscribers who have “Dean” in their firstname field.
city:New York All the subscribers who have “New York” in their city field.

 Note: Because this is a text string search, folks who have “NY” in their city field would not show as a search result.

zip:111 All subscribers who have 3 ones in a row anywhere in their zip field.

To search lists

You can search for subscriber memberships with a few different commands. Keep in mind that you must put quotes around the list name.

  • member_of:”List Name will return all folks who are a member of the list you’ve mentioned.
  • only_in_all_list will return all folks who are not a member of any list, and are active subscribers. This is useful in the case where you haven’t specified a list for your signup form, or if you’ve accidentally deleted a list. Find out more about folks only in the All list.
  • member_of:”*” will return all folks who are not a member of any list, including your Suppression list.

To combine search terms

You can use ANDOR, and NOT to combine any of these search terms. Type in your first search item, a space, your connector (AND, OR, NOT), another space, and your next search term.

Examples

  • not member_of:”All Stars”
    All subscribers who are not a member of the list All Stars.

     Note: Because this is using a connector, note that there IS a space between not, and member.

  • firstname:Dean and city:New York and member_of:”All Stars”
    All subscribers who have “Dean” in their firstname field, and “New York” in their city field, and are members of the list All Stars. Because these are connected by AND, the results will be only subscribers who fulfill all the criteria.
  • member_of:”Rock and Roll Lovers” and not member_of:”Eric’s List”
    All subscribers who are members of the list Rock and Roll Lovers, but aren’t members of the list Eric’s List.

     Note: This combines multiple connectors, to search for more than one criteria, including a negative list search.

  • member_of:”Rock and Roll Lovers” or member_of:”Eric’s List”
    All subscribers who are a member of the list Rock and Roll Lovers, or they are a member of Eric’s List. Because this is using an OR connector, they could be on one list, or even both lists.

Helping recipients view images in your emails – Email Marketing

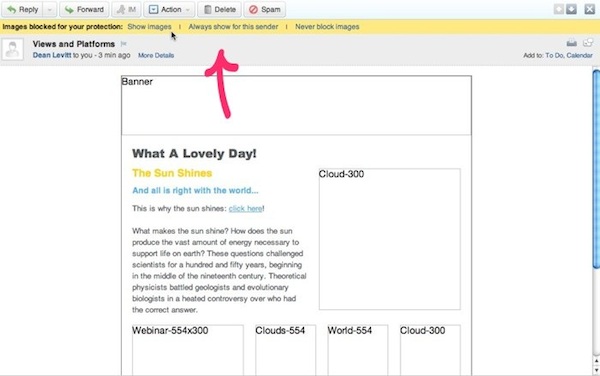
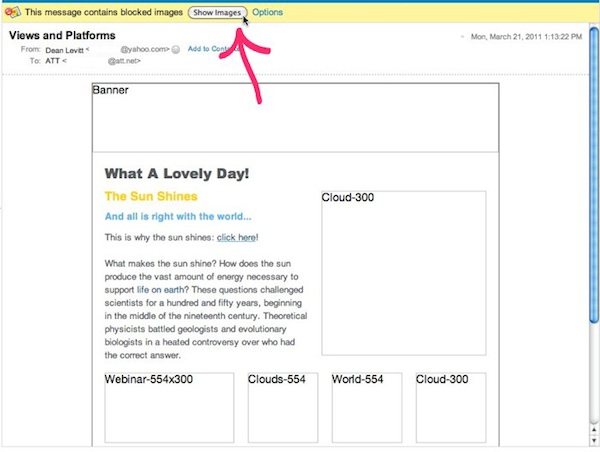
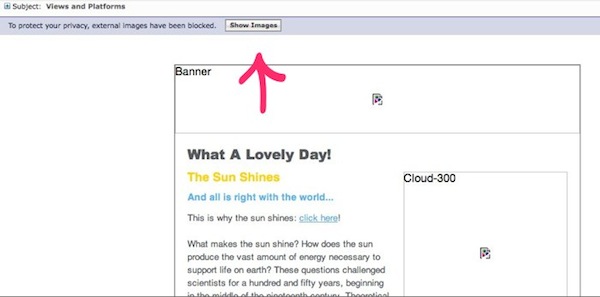
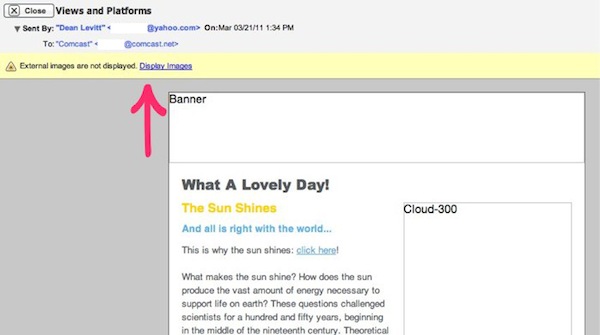
Most email programs don’t show images right away and leave it up to the recipients to choose whether or not to load images. This is mostly for the security and safety sake of their users. In almost all cases it’s simply a setting in the recipient’s email client preferences.

If one of your subscribers has complained that they can’t see any images in your email, it’s best to find out what email program they are using, and walk them through these steps. Most folks handle this on a case-by-case basis, reacting to the prompt on the individual emails. But you can encourage your recipients to set emails from you to always show images.

Here’s how to enable images in the more popular email programs:

Jump to: AOL |AT&T | Charter | Comcast | Excite Mail | Fastmail | Gmail | Hotmail | Juno | Mac Mail | Mail.com | Netzero | Outlook | Roadrunner | Yahoo

AOL:

If images aren't loading in AOL, click

AT&T:

If images aren't loading in AT&T, click the

Charter:

If images aren't loading in Charter, click the

Comcast:

If images aren't loading in Comcast, click the

Excite Mail:

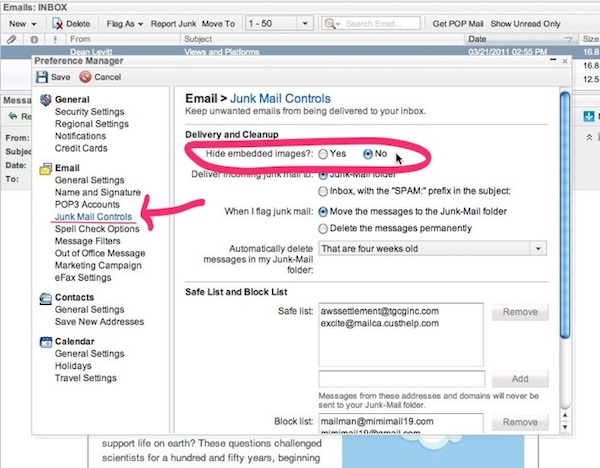
Excite Mail has a two step process, click on Junk mail controls, then

Fastmail:

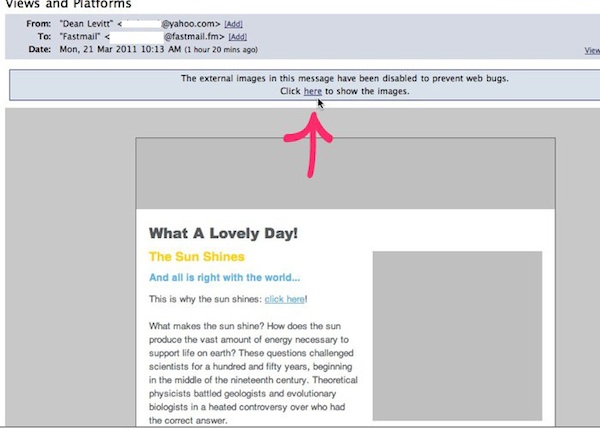
Fastmail displays a option at the top of the email to 'click here to show the images'

Gmail:

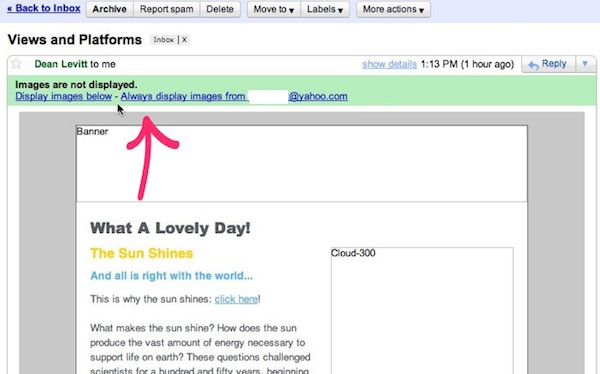
If images aren't loading in Gmail, click

Hotmail:

In Hotmail, click the show content button to display images

Juno:

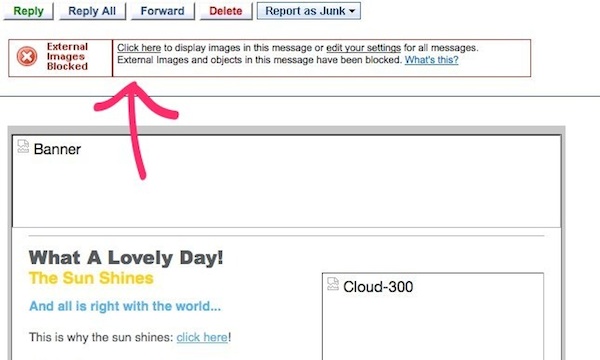
If images aren't loading in Juno, click the link in the 'external images blocked' message at the top of the email

Mac Mail:

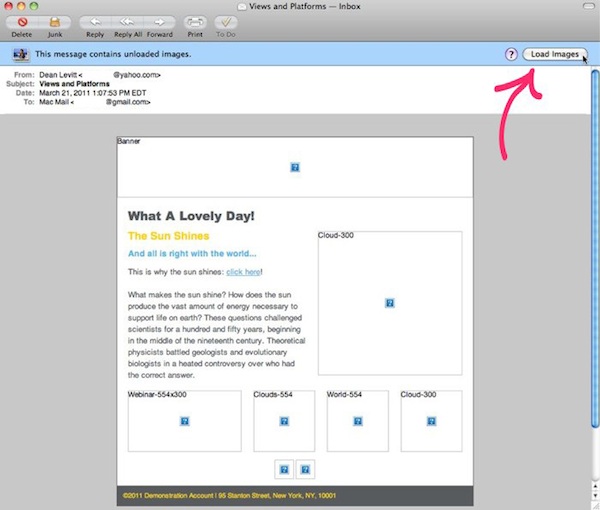
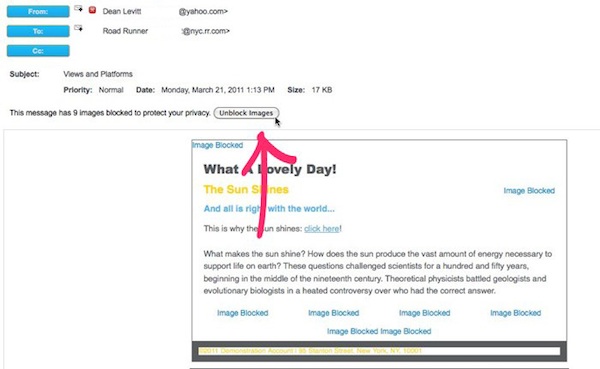
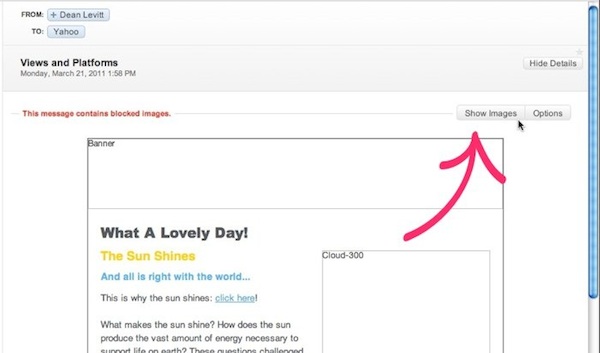
In MacMail, the button to display images is on the top right side of the email

Mail.com:

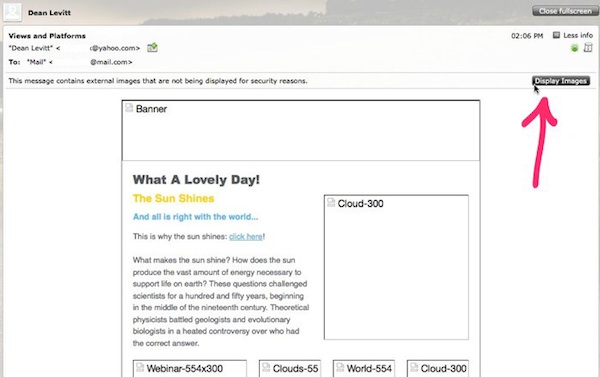
 In Mail.com, click the display button on the top right to load your images

Netzero:

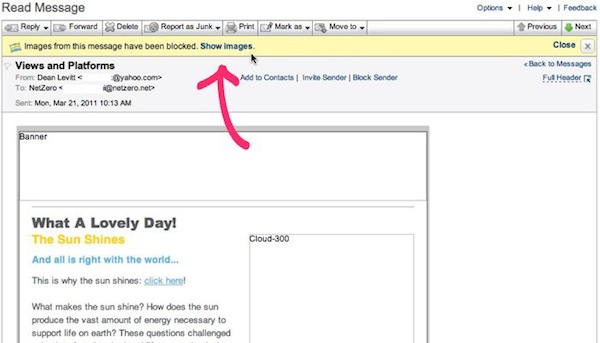
If images aren't loading in NetZero, click the show images link

Outlook:

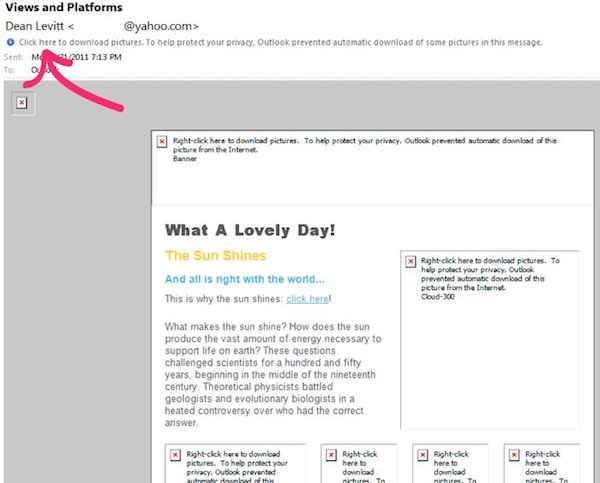
In Outlook, click the message at the top to display pictures

Roadrunner:

 In RoadRunner, click the message to

Yahoo:

If images aren't loading in Yahoo, click the

We offer cheap email marketing plans and email hosting services

Troubleshooting links not working – Email Marketing

Email Marketing Troubleshooting – If your links in your campaigns aren’t working, here are a few things to check.

Issue Try this
Extra http
or
Typo in link
or
Missing link reference
This is the #1 reason most links aren’t working. Links use the markdown formatting of [Link display text](http://linkURL.com)

  • Look at your broken link in the composer, and make sure that everything in the rounded parentheses is a complete and correct link URL, with no extra “http”.
  • Copy everything in the parentheses, and paste it into a web browser, to make sure it’s working.

More info on adding links to text and images.

Google Analytics problems If you have Google Analytics integrated, it will add a whole bunch of extra parameters to your links, to look something like this:

http://linkURL.com?utm_source=Email Marketing&utm_content=xxx…

Copy only the first part, up to the ?, and paste that into a browser. If it works that way, there’s a problem with your Google Analytics set up.

See more info on setting up the Google Analytics addon.

It’s very smart to give all links a quick test before you send the email to others. You can do this in the Preview screen, and by sending yourself a test email.

Adding attachments to campaigns – Email Marketing

Email Marketing does not support traditional email attachments, but you can still share files with your recipients.

Why can’t I attach files to my campaigns?

This is because attachments can significantly hurt the ability of your emails to land in your recipients’ inboxes. Bulk emails with traditionally attached files, most likely will end up in the spam folder. There are many cases of attachments being used to spread malware, so campaigns that contain attachments are likely to be flagged as spam by ISPs (internet service providers) and email clients.

How to send files to your subscribers without attaching

Store your file somewhere online (such as your own website), and generate a public link to that file.

Store your file with… How to generate a link
Online Storage (Workspace Email) Copy a public link
Google Docs Share a link to a file
Dropbox Share link

Next step

Next, take that generated link, and put it into your campaign. You can link your file to:

Viewing and editing subscriber details – Email Marketing

Only Name and Email details are displayed on the main page of your Subscribers area, but you can always view and edit subscriber details in a couple of clicks.

  1. If you haven’t already, log in to your Email Marketing account. (Need help logging in?)
  2. In your Subscribers area, click on the email address to view or edit their details.
  3. Click in any field you see, to edit it.
  4. Click Add to List to add the subscriber to any of your specific lists. The subscriber’s current list memberships are unaffected by this action.
  5. Click Add another field to add another data field to that subscriber, only.

Next step

Making a regular campaign into an autoresponder email – Email Marketing

So you’ve created a new campaign, in your Campaigns page… and now you want to use it as a Autoresponder email. Fantastic, you’ve come to the right place.

When you click the Clone button on any campaign in your Campaignspage, an exact copy of that campaign will be created. You can also use this very same button to clone that regular campaign into an Autoresponder email!
Click the Clone button

Pro tip: Make sure you create your Autoresponder first! That way, you’ll be able to tell Email Marketing exactly where to put the cloned campaign.

When you’re ready, just click the Clone button, and select the Autoresponder option from the overlay page that pops up.

Choose the correct campaign from the list of all your Autoresponders, and then click the Clone button. Email Marketing will take care of the rest for you. Go to Autoresponders under the Add-ons menu, to check out your new addition.

All about Autoresponders – Email Marketing

What is an Autoresponder?

These campaigns are an awesome way to send a series of interval-based emails to people automatically, when they’re added to a specific list in your subscribers. They are great for sending out welcome emails, follow-ups or a series of emails all about a specific topic.

An Autoresponder, consists of emails that you create, place in a certain order, and then specify the intervals at which they’re sent. You can activate the Autoresponder feature via the Addons menu, at the top of any screen. Just choose Add more and then find the Autoresponder option.

Why would I want to use Autoresponders?

An Autoresponder is different from a regular email because it’s an automated series of emails. You set it up once, and then anyone added to that specific list automatically starts to receive your campaign.

A regularly scheduled email is just a single email you send out to your list on a specific date. The Autoresponder, however, will send out a series of emails, in an order and frequency that you specify, all starting at the time the subscriber signs up. You design how it works, and never have to do another thing with it!

Because it’s automated and pre-set, an Autoresponder is perfect for:

  • automated welcome emails, when someone signs up for your content
  • delivering a sign-up gift download
  • a curriculum, or instructional series of emails
  • a quote or thought-a-day series
  • nudges, reminders, or check-ins for your subscribers
  1. If you haven’t already, log in to your Email Marketing account. (Need help logging in?)
  2. Activate the feature under Addons at the top of any screen. Choose Add more, and then scroll to the Autoresponder option. Turn it on, and then click on Go set it up. After you’ve activated the addon, you can find it as the Autoresponders option under the Addons menu.
  3. Click New Autoresponder and specify your settings in the Create a new autoresponder screen. These include:
    • The name of the whole Autoresponder
    • The list associated with the Autoresponder (CANNOT be edited).
    • The standard interval between emails (CAN be edited)
    • Whether or not the first email should send immediately
    • Whether or not to send the Autoresponder on a weekend
  4. Click Create my Autoresponder! to save those settings. Then click Add the first campaign, and select Compose new, to create the individual emails. This is exactly the same as composing a regular campaign.
  5. Specify the mailing details for each of the emails that you create. This includes all the normal email sending details, the interval to use to send the email, and whether or not to send the first email immediately after someone subscribes.
  6. After you’ve completed the first email, click Add another campaign, and repeat until you have all of your Autoresponder emails created. You can go back, and change the intervals between them at any time.
  7. Check that everything looks good, and click Start or Run. Anyone already in your associated list will be treated like they just signed up, and they’ll start to receive the campaign. Anyone who is added at any point later will start the campaign at that time.

So How Do the Intervals Work?

Autoresponder intervals are just the amount of time Email Marketing waits before sending the next email in the campaign. You can set the standard interval between emails right when you set up your Autoresponder. And you can also adjust them individually at a later date.

For the first campaign in your Autoresponder, you can decide if you want it to send immediately after the person subscribes to your list or not. For all other emails, the interval is expressed in amount of time AFTER the person receives the PREVIOUS email.

To Change the Intervals

  1. Under Addons, go to Autoresponders.
  2. Click Edit on the individual Autoresponder.
  3. Click on Settings underneath the campaign you want to change.
  4. Change the interval using the buttons at the top. Only for the first email in the Autoresponder, you will have the option to send it immediately, or not.

To Start and Stop an Autoresponder

When you first set up your Autoresponder, it will be paused. You’ll have to manually start it once you’re ready to show it to the world. You can start it from two different locations:

Go to your Autoresponder area.

  • Click Run under any of your Autoresponder thumbnails, OR:
  • If you’re already in a specific Autoresponder, then just click on the Start in the top right.

If your campaign is already running, you can pause it at any time, too. You do this exactly the same two ways as starting it!

Go to your Autoresponders area.

  • Click Pause under any of your campaign thumbnails, OR:
  • If you’re already in an Autoresponder, just click on Pause in the top right.

To Make a Regular Campaign an Autoresponder Email

You can actually clone any regular campaign you create right into an Autoresponder. You’ll need to have the Autoresponder created already so that the campaign can be easily cloned into it.

  1. Click the sheep clone button underneath the campaign thumbnail of the email you want to make into an Autoresponder email.
  2. Select the Autoresponder option, and then select the specific one you want to clone it into.
  3. Click Clone and that’s it!

How do I Connect My Signup Form and an Autoresponder?

This is probably the most common use of the Autoresponder feature, or really any auto-responder functionality, in general. When something exciting happens (someone subscribes to your list), you want to react (send them a welcome email)! Who doesn’t? In order to make sure that your Welcome Email campaign sends automatically to your new subscribers, you just have to connect your signup form to the same list that is associated with your Autoresponder. (For details about signup forms, see Signup forms .)

To Connect Your Signup Form to an Autoresponder

You can only associate a single list with each of your campaigns, but you can have several lists (or none!) connected to each of your signup forms:

  1. Click on Signup Forms at the top of your screen.
  2. Click Edit under your specific signup form, in order to adjust which lists are connected.
  3. Check that your Autoresponder list is connected to your signup form, and that your campaign is running, and you’re all set!

For more detailed instructions, check out the Step-by-step Tutorial for Connecting Signup Forms and Autoresponders.
Create your own custom style – Email Marketing

You have several pre-set style options to choose from, in your Styles menu. You can also edit any of the existing color or text settings in each one of those. You also have the option of creating your very own, custom style.

  1. If you haven’t already, log in to your Email Marketing account. (Need help logging in?)
  2. In your Email Marketing account, click Campaigns.
  3. Click Compose for a new campaign, or Edit on any existing campaign.
  4. Click the Styles tab, on the right.
  5. Click the Create your own.
  6. Enter a unique name for your custom style.
  7. Click the button for how you want to start your own custom style:
    • Create new will start you from scratch. This is best for totally fresh looks.
    • Clone current will copy the currently selected style. This is the best option for small changes.
  8. Next to Name, you can change the name of the style.
  9. Next to any of the elements listed, you can enter a hex code, or click the colored box to choose from a color picker.

     Note: As you select different options your campaign will change, so you can preview the new looks, in context.

    Element Details
    Background This is the color surrounding your campaign, on the outer margins.
    Foreground This is the color inside your campaign, behind the text and image content.
    Button In addition to choosing the color of your buttons, you can also choose the button style:

    • Flat button style Flat
    • Pill style button Pill
    • Chunky style button Chunky
    Border This can be turned on and off with the check box. This is a colored line around your campaign content, between the Foreground and the Background colors.
    Footer This can be turned on and off with the check box. If it is turned off, the footer details will display on the Background color.
  10. Click the Text tab.
  11. Click on any text type to customize the style.
  12. Click on any option to set your style.
    Option Details
    Font Select your desired font from the menu.
    Color Enter a hex code, or click the colored box to select from a color picker.
    Size Click the larger A to increase the font size, and the smaller A to decrease it. The actual size in pixels displays to the right.
    Alignment Choose which alignment you want this text type to use. Your options are left, center, right, and justified.

     Note: For Link text, you only choose color. All other settings are inherited from regular body Text.

     Note: For Button text, you can’t change alignment, here. Alignment is changed in the button module, in the composer.

     Note: For Footer Text, you can’t change alignment, here. Footer alignment is controlled through the Campaign Tweaks Add-on.

  13. When you’re finished with a specific text type, click <, to go back to the main list of text types.
  14. When your style is finished, click Update.

Your new custom style will always appear in your style list, so you can use it for any campaign.